Raw Syslog Forwarders collect and forward raw logs from a Logpoint to a remote target.
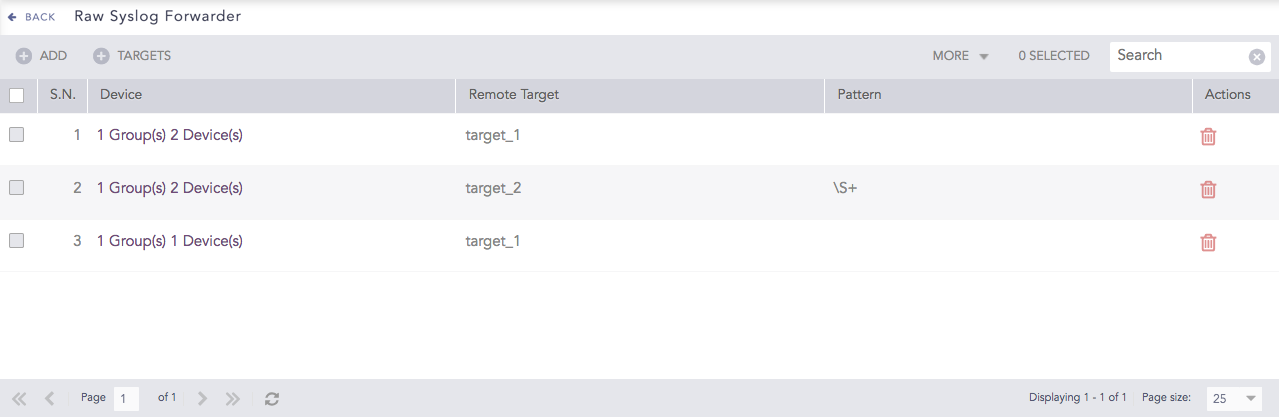
Raw Syslog Forwarders
To sort the columns in ascending or descending order, move your cursor to the column you want to sort. You will see a down arrow; click it and select Sort Ascending or Sort Descending.

Sorting Columns
To filter the columns you want in the UI, click the MORE dropdown, click Columns, and select the columns you want.

Filtering Columns in the UI
To use Raw Syslog Forwarders, you must configure both Target and Device.
Targets are the devices where the raw syslog messages are forwarded. For example, if you want to forward the logs from your Logpoint to a remote Logpoint with IP 10.10.10.149, you have to add a target with IP 10.10.10.149 or its hostname.
You can send logs to the same target via different ports too. To do so, you can add the same target IP multiple times, each time with a different port number.
Go to Settings >> Configuration from the navigation bar and click Raw Syslog Forwarder.
Click TARGETS.
Click Add IP or HostName.
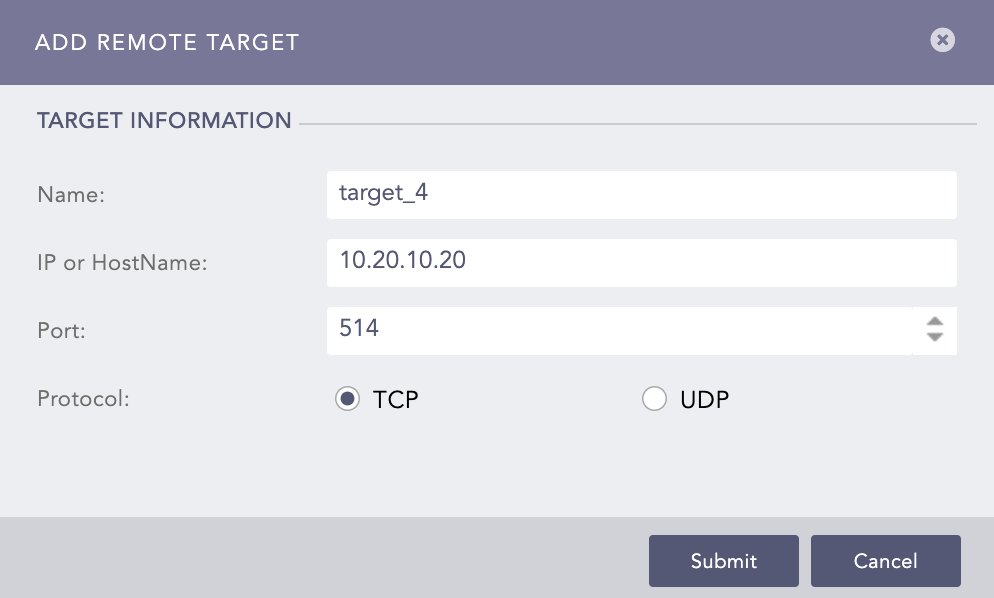
Add a Remote Target
Enter the Name, IP Address or HostName, and Port number for the input port of the target.
Select the Protocol to send the syslog message. Choosing UDP enables IP Spoofing. IP Spoofing allows you to directly add the log collection devices in the target logpoint instead of adding them in the raw syslog forwarder, and the target logpoint still identifies the raw syslog forwarder where the logs are collected.
Click Submit.
Go to Settings >> Configuration from the navigation bar and click Raw Syslog Forwarder.
Click TARGETS.
Click the target you want to edit.
Update the information.
Click Submit.
To delete a target, make sure that it is not in use.
Go to Settings >> Configuration from the navigation bar and click Raw Syslog Forwarder.
Click TARGETS.
Click Delete ( ) icon under Actions.
Click Yes.
Devices collects and forwards raw syslog messages to the target Logpoint.
Go to Settings >> Configuration from the navigation bar and click Raw Syslog Forwarder.
Click ADD.
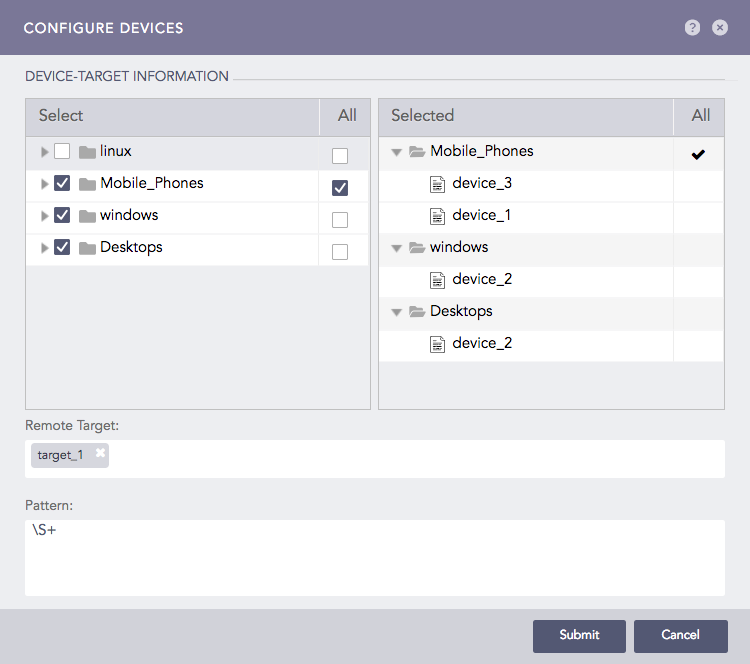
Configure Devices
Double-click the devices or device groups to select them. If you select All for a device group, any device added to it in the future is automatically selected as a target.
Select the Remote Target(s).
Provide a regex Pattern to match before forwarding logs. Only the logs matching the specified pattern are forwarded. For example:
[ 0-9 ]+ forwards a log only if a digit is present in logs.
[ a-z A-Z 0-9 ]+ forwards a log only if it contains either a-z, A-Z, or 0-9.
\S+ forwards all the logs.
Click Submit.
After the configuration, Raw Syslog Forwarder now collects logs from the added devices and forwards the raw logs to the chosen targets.
Go to Settings >> Configuration from the navigation bar and click Raw Syslog Forwarder.
Click the Device of the required Raw Syslog Forwarder.
Update the information.
Click Submit.
Go to Settings >> Configuration from the navigation bar and click Raw Syslog Forwarder.
Click Delete () icon under Actions.
Click Yes.
To delete multiple Raw Syslog Forwarders, select the concerned forwarders, click MORE, select Delete Selected, and click Yes.
To delete all the forwarders, click MORE, select Delete All, and click Yes.

Deleting Raw Syslog Forwarders
To view logs from localhost, you must add the IP of the Raw Syslog Forwarder in the remote target. You must also configure its Syslog Collector.
While forwarding localhost logs, Logpoint adds additional data in the header and sends the original message in the following format:
<13> {local date time} {hostname} {original message}
Example:
Original Message |
Forwarded message |
|---|---|
2016-01-29_06:00:20.70969 Starting report_jobs. |
<13> Jan 29 06:00:25 localhost 2016-01-29_06:00:20.70969 Starting report_jobs. 13 is the PRIVAL representing log audit. |
You have to add a device in target logpoint and configure its syslog collector to view the logs forwarded from that device. A remote target supports both TCP and UCP for localhost; however, it supports only UDP for other devices.